We always tell you that our control ecosystem is very scalable, practically without limits, today we are going to show you why this scalability.
The first thing to remember is that in our ecosystem we have different controllers, depending on the work to be done, one or the other is suitable.
In this case, when we talk about scalability, the Adquio pro, Adquio Lite and Adquio Mini controllers are at the base, they are in charge of taking the data and controlling the end devices.
At one or more intermediate levels we have our Adquio Micro Server, fully suited to take data from several lower level controllers, process it and provide it to the upper level.
At the top of this whole system we have our Adquio Server. The most powerful and designed to support tens of thousands of variables and above all consolidate data from all lower levels and if necessary serve them to the Adquio Cloud BMS or an Adquio SCADA Server or Cloud.
All right, all this requires that the different levels of this structure communicate as smoothly and quickly as possible, right? For this reason, these connections are made via real-time sockets. This ensures that changes of values in the base controllers reach the higher levels immediately.
And how does this communication take place?
Configuring the Adquio device that will serve data.
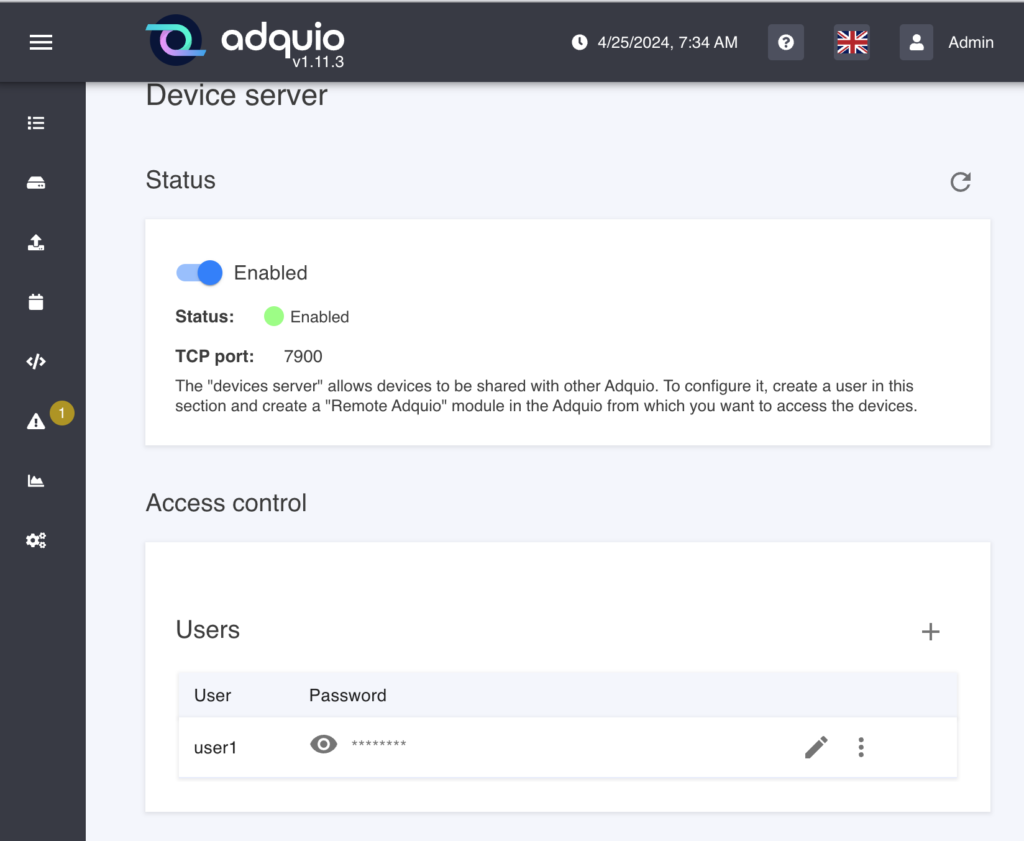
To start, we must go to each Adquio controller that will share data and set up a username and password that you will then use on the Adquio controllers that will connect to it. This will be referred to as a slave. You will find it in the System menu => Device Server.
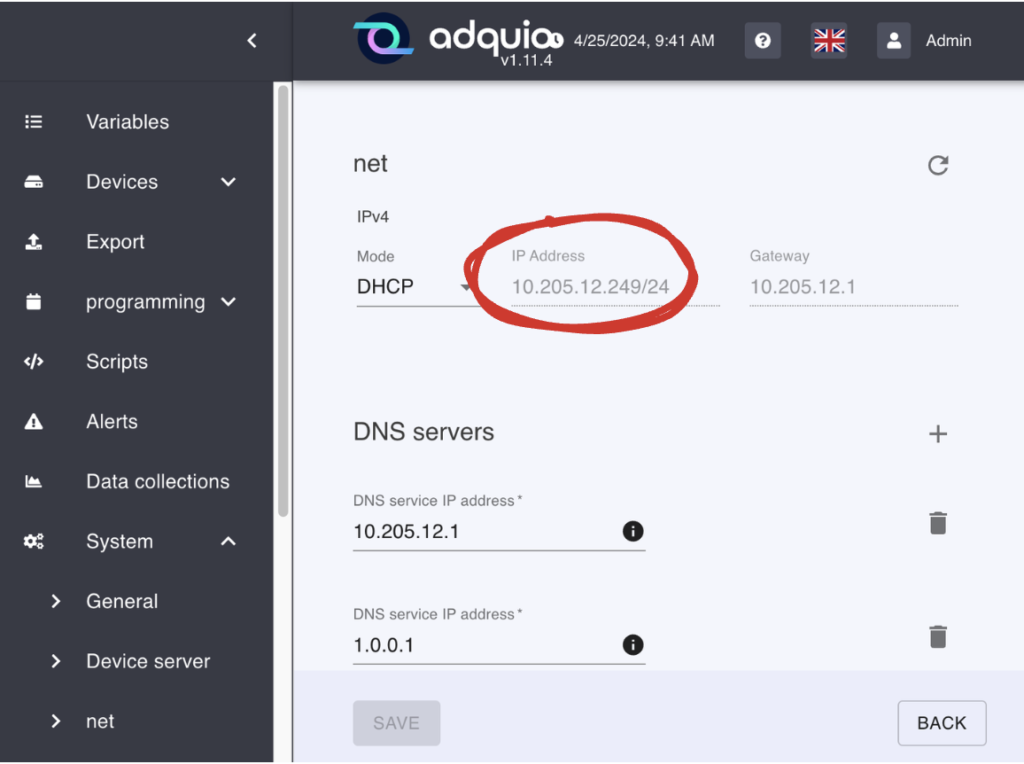
Now we must know the IP address of our Adquio, we will need this later to connect to it. To do this, you can go to system => Network and make a note of it. On the slave device, you do not need to do anything else.
Configuring the Adquio device that will consume the data.
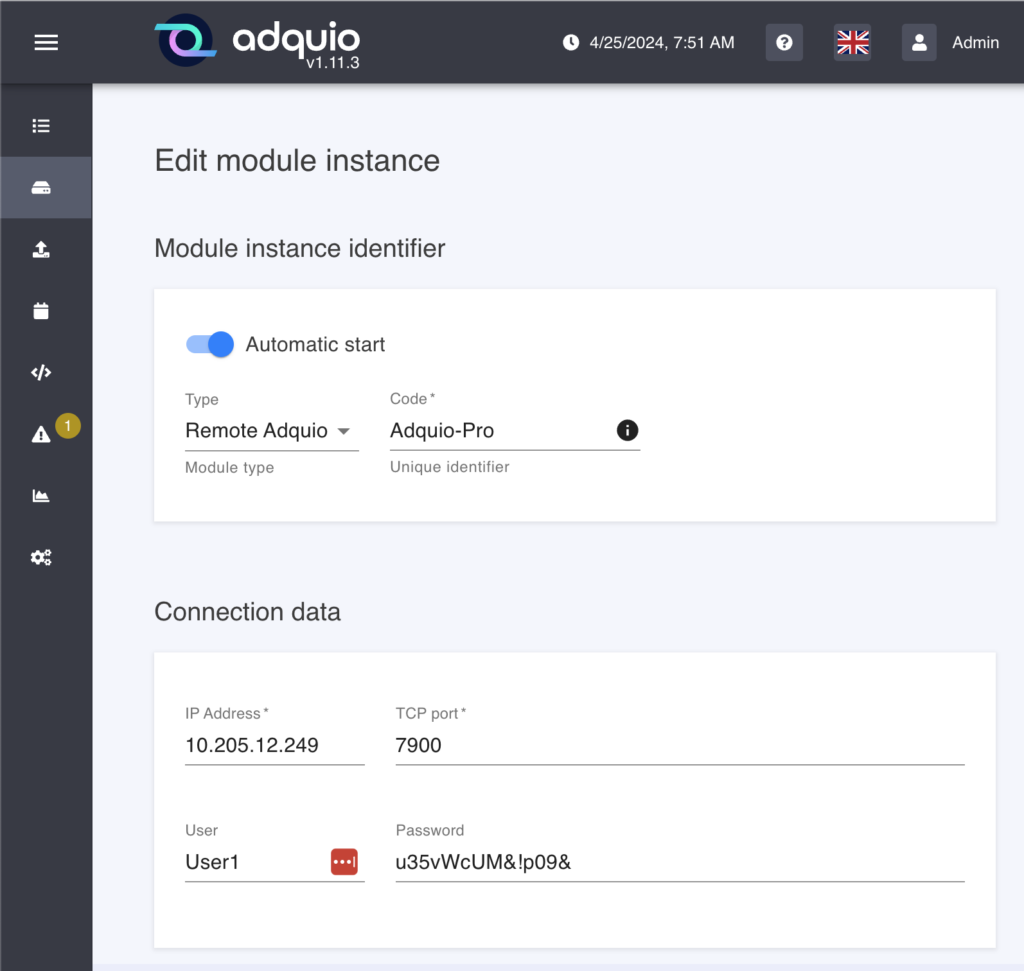
Now we go to the other controller and create a new module of the Adquio-remote type.
We use the IP address we wrote down and the same user and password we created in the slave controller.
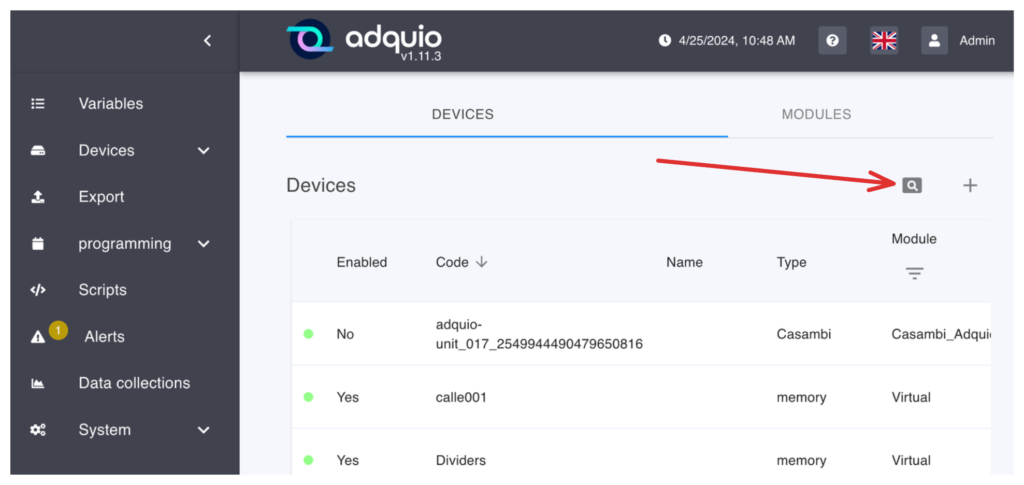
The next step is the easiest and most fun, see everything the slave provides us with and select only what we are interested in. To do this, click on the magnifying glass icon in the devices tab.

This will open a window that allows us to decide which device we want to scan, select the one we had configured and click the ‘Scan’ button.
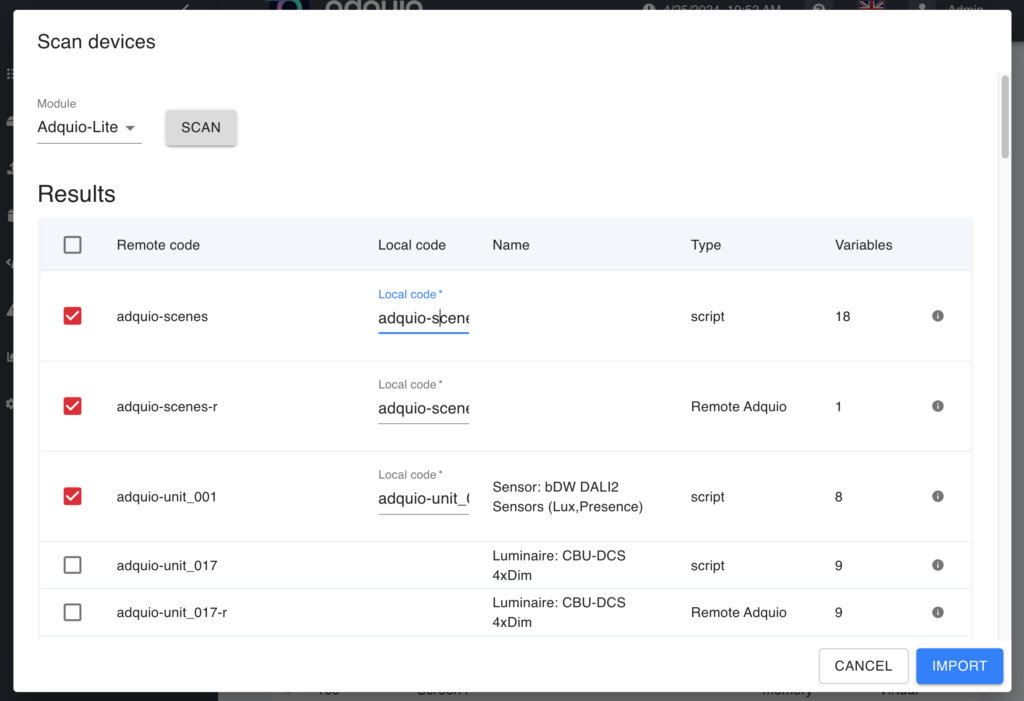
When doing so, Adquio will show us a list of all the devices that our slave is sharing. Simply, by selecting it in the box on the left, we can decide which ones we are interested in. And additionally as you can see in the image we can change the name with which we will see it in our list of devices once imported.
When you have finished selecting and naming them, click on the ‘Import’ button below and all of them will automatically become your Adquio devices with all their variables .
Remember that from this moment, all this information will be automatically updated every time the values change in the Adquio that is providing them to you.
This way, you can virtually bring as many slave controllers as you need to one controller. In addition, and if you request it, this communication between controllers can be encrypted, so that if you need to pass it through an untrusted network, your data will remain safe.
As you can see, it is very easy to connect our controllers in a structure, master ⇔ slave. This, you can do with all the levels you need, since a data imported from another controller can also be exported to a third one as another device.
Imagine the possibilities for growth and adaptation that this feature offers you. We continue…

